30 Oct 2016

farewell


I have procrastinated over writing these words, because I kept hoping I’d change my mind. And I hate quitting on anything. But it is time to close Dig In.
Simply, my energy, drive and time for sustaining my blog - looking for new things to do or bake, and then to write about them; staying up to date with the many wonderful blogs around Australia and in the UK - has waned. I have a pretty ordinary life, and sometimes it’s not really worth sharing!
Thank you to everyone who has helped me create Dig In. Thank you to everyone who has read my words over the past five years. It really has been surprising and wonderful to connect with like-minded people around the globe.
But my biggest thanks go to my mum and dad. Without them, there really would be nothing to write about; they have taught and guided me (and done) so much: in the garden, in the kitchen, and in life. I love you both so, so much.
Take care everyone,

28 Aug 2016

cannellini cannelloni

As a Grown Up, I don’t need clever ways to hide vegies in a meal. Instead, I need new ways to make those vegies on my plate more interesting.

But this cannellini cannelloni (I love saying that!) does disguise the vegies, should you need to do that. It replaces half the ricotta in the stuffing with whizzed-up cannellini or white beans and a good handful of cauliflower florets. Just think of all that extra vegie fibre and protein and flavour! They even make this filling even creamier and lighter somehow, so it’s like a hearty plate of winter stodge — but not. I also added some shredded and cooked Brussels sprouts, and a delicious shake of warming nutmeg. Yum!

To top off all this vegie-packed goodness, I made an instant sauce from a tray of my summer tomatoes from the freezer. As I’d roasted them with herbs and garlic before freezing, all I needed to do was thaw the block and whiz it in my food processor, to make a thick, richly coloured and flavoured puree.

Then I topped this off with some walnut and pepita chunks. That’s right — no breadcrumbs or parmesan. Just waxy-toasty-crunchy goodness (yes, this is a dish full of goodness). Even when softened by reheating in the microwave for my week-day working lunches, the nuts complimented those hidden nutmeg flavours so well, and still retained enough texture to contrast with the creaminess of the cannellini filling.

So yes, this winter winner (and it's still winterish here in Hobart) does hide the vegies — and it also made them even more delicious and fabulous, too.

Cannellini cannelloni

My scribbles say I got this recipe from Donna Hay june/july 2012. If you have leftover cooked vegies like the cauliflower and Brussels sprouts (or broccoli or cabbage or silverbeet), this dish is really speedy to make. If you have a ready-made sauce like I did — even better; you’re barely cooking at all!

If you need to make a sauce, my notes from the recipe simply say 'combine 365 ml passata, 125 ml stock, S&P'. Presumably you'd heat and reduce the lot together to a saucy consistency. Sorry.

  • Put about a third of your sauce in the bottom of your baking dish, saving the rest for the topping.
  • Preheat your oven to 180.
  • In a food processor, whiz up a drained/rinsed 400 gms can of cannellini beans.
  • Add in 300 gms of ricotta (the thicker block stuff bought from the deli).
  • Add about a cupful each of cooked cauliflower florets and shredded Brussels sprouts, plus a generous shake of nutmeg.
  • Take a packet of fresh lasagne sheets (there were 12 in my packet). Place a couple of spoonfuls on each sheet and roll up, then pack the tubes into your baking dish on top of the sauce. This is where it all gets a bit imprecise. I had to cut the tubes in half to fit them in; use a second, smaller dish to hold them all; but then I didn’t need one of the lasagne sheets (I put it in the freezer for next time)!
  • Once you’re done with all this juggling and jiggling, top with the remaining sauce.
  • Roughly chop some walnuts and pepitas; enough to give a covering you’re happy with. Drizzle with a little olive oil; cover with foil; then place in the oven and bake for 20-30 minutes or until the filling is hot. Then uncover, and bake for another 10-15 minutes or until the nuts are toasty.

21 Aug 2016

chocolate hazelnut brownie


It’s good to have working, reliable scales in my kitchen again! Because, as soon as you don’t, every recipe you’re tempted by measures ingredients out by grams, not cups. Is this volume or mass or something else? I don’t know, but until recently, I couldn’t do it!

A few months ago I knocked my kitchen scales off the kitchen counter, and that was that; the spring mechanism was absolutely bung. Like a wonky clock, the little arm that dialled around was immovably set. Gah!

I actually prefer to scoop out my sugar, flour and cocoa (or spoon it into the cups to avoid incorrect compaction). I have a sweet pastel set, shaped like miniature mixing bowls. They even have a little pouring lip — so small it’s ineffective — but their soft pretty colours make me very happy.

But, scales are called for. I tried to get by — once I phoned mum and asked her to weigh out some dry ingredient then transfer it to cups, so I would know what to use. Not ideal.

Have you tried to buy new scales recently? They are all digital.

Which presents a real problem to me, because I’m allergic to digital scales. Or they’re allergic to me. They do not work for me. I must have some magnetic force field that disrupts their digital-ness. They give crazy, improbably readings, or simply blink off (I could never wear a digital watch as a kid either, now that I think of it). I’ve gone through countless batteries, and two, maybe three actual scales; either returning them to the shop or giving them to mum.

Finally, after much ringing and googling around, I found a non-digital replacement for my scales, online. I wanted the finer ones that went up in 5 grams increments — and they really were hard to track down. So I bought two, one for spare, and the one I’m using is being stored and used very carefully.

Chocolate hazelnut brownie
Adapted from a delicious recipe for a ‘sheet cookie’. But made smaller, in a brownie tin, so moister and … a brownie.

  • Preheat your oven to 180 and line a 20 cm brownie tin or small slice tin (as seen in here. Okay, I've made it twice in two different tins! But I'm still calling it a brownie)
  • Melt 50 gms 70% dark cooking chocolate.
  • Cream 100 gms butter with ½ cup brown sugar. Beat in 1 egg, then the melted chocolate.
  • Sift in ½ cup hazelnut meal, ½ cup spelt flour, 1 tbspn cocoa, and ¼ tspn bicarb soda.
  • Fold in 75 gms of milk cooking chocolate that you’ve chopped roughly (you want some chunks to remain for texture).
  • Put in the tin – as I said, I’ve made this twice, and once it was super hard to spread, and the second time not a problem. I’m blaming the change in weather on that.
  • Now scatter over 1/3 cup hazelnuts that you’ve roughly chopped up and press in lightly.
  • Bake for 20 minutes before checking; like a brownie, this should stay moist.
  • Remove from oven and try very hard not to eat it all at once.

7 Aug 2016

mum’s orange and sultana cupcakes

I’m thinking of turning Dig In over to my mum (actually she suggested it first). Or, baking cakes only after mum has successfully, deliciously, tried the recipe first.

Mum’s orange and sultana cupcakes
Adapted from ‘Better Baking’. Originally a small loaf cake, I made the recipe as cupcakes to use up some baking papers. Either way, it goes nicely with an afternoon cup of tea.
  • Preheat your oven to 160 and prep your muffin tins.
  • Cream 90 gms soft butter with ¾ cup sugar and the zest of 1 orange.
  • Beat in 2 eggs.
  • Sift in 1½ cups SR flour.
  • Fold in ½ cup sour cream and ½ cup sultanas.
  • Add mixture to tin and bake until done; cupcakes will only take about 25 minutes.

31 Jul 2016

half and half risotto


I get pretty excited when I find a new lunch or dinner recipe that’s easy to make, delicious, and healthy. I don’t ask for much, do I? If it can be flexible enough to suit whatever’s in season — or in my fridge — it ticks even more boxes, and might just be a recipe that I’ll add to my list of regulars.

I’ll admit I’ve only made this half and half risotto once, but I know I’ll make it again. Easy? Yes, because risotto is just add one thing after the other and give it a stir (at least it is with me). Delicious? The dark outer leaves of the new-season savoy cabbage had a pleasing bitterness, the leeks were sweet, and the lemon added a nice tang. And healthy? With peas and mushrooms and cabbage, there’s a good serve of veg in every bowlful.

The half and half mix of traditional arborio rice and trendy quinoa makes for a nutritious blend I’m sure, and a lovely light and creamy texture. I’ve made risotto with all rice of course, and risotto with all-quinoa, but never thought to combine the two (even though I do all the time in my rice cooker). It works! I’d have to say it’s the best of both worlds.  

A good risotto recipe must be infinitely adaptable for all kind of ingredients and flavours — a good base to work from. And I can see this one will be — maybe I’ll try pumpkin next time, or silverbeet and peas, or zucchini in the summertime, or asparagus…

So hurrah to having a new favourite!

Half and half risotto
Adapted from ‘Superlegumes’ by Chrissy Freer.
  • First some prep. Thaw out a cup of frozen peas, slice up the white of a leek (and a little bit of the lighter green part), roughly chop 200 gms mushrooms and a few garlic cloves (to your taste). Shred a few leaves of dark savoy cabbage (sorry I’m not very precise here — but you’ll know how much cabbage you like).
  • Weigh out 150 gms arborio and 100 gms white quinoa, and rinse it well.
  • Set 1 litre of liquid to simmer — I used a combination of water, homemade and bought vegie stock. Boil the kettle too, as you’ll probably need to add more liquid as you cook (risotto can be so imprecise, and thirsty).
  • Okay, let’s get cooking! In a deep casserole pot, sauté the leeks in oil until soft. Add the garlic and the leaves from a few sprigs of lemon thyme.
  • Add the rice and quinoa and stir till well coated with the oil.
  • Add 80mls white wine and simmer for a few minutes.
  • Now add the simmering stock. Be lazy like me and add it all in one hit. Stir well and after about 20 minutes, test the grains (you want them soft) and watch the liquid levels. You may need to add more from that boiled kettle to ensure the risotto doesn’t stick, has enough liquid to cook the grains, and is your preferred ‘wetness’. I like my risotto a little sloppy.
  • When the rice is about 5 minutes away from being done, add in the mushrooms, cabbage and peas to cook.
  • When those veg are just done, add the fine zest of one lemon — and why not, add the juice of half of it as well. Enjoy!

24 Jul 2016

individual bread + butter puddings

Since we’re all about putting your own spin on things chez Dig In, here’s a neat twist to an old favourite: individual B&B puddings. I would say guaranteed portion control, but as I ate two hot out of the oven and two later than night, fridge-cold and creamy, that’s not really valid.

I got the idea from a library book; one of those London bakery–café books that are very popular (or at least plentiful on my library’s shelves). I remember thinking ‘individual puddings — how cute!’. I probably also thought ‘portion control!’ but that, as I said, has been massively disproven.

I didn’t copy out the recipe because I have my own that’s my ‘go-to’. This time I used torn-up panettone sploshed liberally with sherry, then I poked in some chunks of rich medjool dates, and to the custard I added the zest of an orange. It was a fine combination of flavours, hot or cold.
And cute — very. As I tucked into my first one, I thought that these were definitely brunch-style café offerings. I imagined them served on a shiny white plate with an artful dollop of greek yoghurt and maybe a swirl of blueberry compote around the plate — and a hefty trendy-café price tag. I’m getting carried away, because these are not pretentious at all! They were just a very good spin on a traditional pudding.

So I’m not going to give you a recipe — as I said, I used my go-to and I’m sure you also have a family favourite. The point therefore of this post is perhaps to inspire you to play around with your favourite too.
Individual bread + butter puddings

Instead of cooking these in a bain marie, which is standard B&B pudd practice, I simply lowered the temperature to 160. I made 8, and they took about 30 minutes to cook.

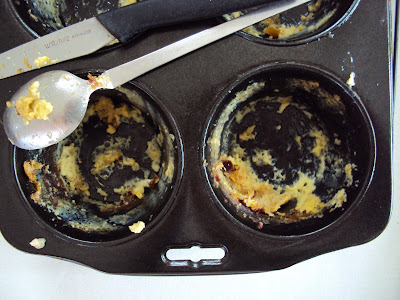
A note to self: use papers to line the tins next time. Perhaps those café style muffin papers that are like a plain piece of parchment pushed in to the tin, all folded and pointy. That would make them easier to remove and make the tin easier to clean!

17 Jul 2016

vanilla + thyme roasted pears


Cooking day. Lentilaise again, this time with my own roasted tomatoes, frozen at the peak of their summer richness. A handful of dried lentils.
 

And blitzing all the base veg (including some broccoli stalks — extra greens!) in the food processor first. An even better version.


Trays of roast veg: dad’s pumpkin, spiked with lemon zest and Moroccan spices. Kipfler potatoes, just salt and rosemary — so good. I kept gobbling them, hot from the baking tray, even though they were meant for weeknight dinners.


Then roasted pears. The week before I’d roasted the pears with harissa and lemon zest, alongside parsnips and pumpkin. But this time I followed a tip off from Lizzy and enjoyed a gorgeous after-dinner treat — and a perfect send-off for the last of dad’s beurre bosc pears. Honeyed, herby and meltingly tender fruit soaking in a rich speckled syrup. I may have to buy some pears to make this again.

Vanilla + thyme roasted pears
Adapted from Liliana’s Kitchen.
  • Preheat oven to 180.
  • Halve and core 4 beurre bosc pears and add them to a baking dish so they are one snug layer, cut side up.
  • In a heatproof jug, combine ¼ cup honey, ½ cup boiled water, the juice of ½ a lemon, and ½ tspn speckly vanilla paste.
  • Pour this over the pears (scraping out those speckles) and sprinkle over some fresh lemon thyme leaves from a few sprigs. Place a small dot of butter in each pear’s hollow.
  • Cover with foil and bake for 20 minutes. Then remove the foil, baste the pears in the juices (you can even turn the pears over if you wish) before returning to oven, uncovered, and cooking for another 20 minutes or so, until fruit is tender.

18 Jun 2016

mid-winter hiatus

Life is topsy-turvy at the moment. My brain is fizzed; I have no creative energy nor time to travel around to everyone else's wonderful blogs. So Dig In is having a small hibernation; hopefully only 3 or 4 weeks. Please don't forget me, please check back soon; and please keep warm and dry over winter - or enjoy a lovely northern summer.
e

12 Jun 2016

garden ramble: frost and rain

As I write this, it is raining gently, it is damp and muggy, and everything is a bit soggy. The weather has been wild everywhere, and while my patch of the world is getting off lightly … can it stop now?

This week has been warm (for Hobart, for this time of year) with days of rain and cloudy skies and low light (and no light). Rain tanks and gauges are full. The last autumn leaves lay abandoned in puddles, and my candy-floss-pink camellia is now a sad, sodden mess.

But all this came after a week of dry, severe frosts and desperately low temperatures. Each day, I would email mum and dad a report: ‘frost bigger than yesterday!’. I love the stark silence of a big frost, just as I love snow-on-the-mountain — as long as I’m not out in it.

So measures were needed for those of us who were outside. Every morning I broke through the ice on my bird baths: sometimes a thin crystalline layer; once, thick and nearly solid. And every day after work, sometimes in bone-chilling dark, I draped my still-tender passionfruit vines in old paint sheets; each morning, I unpegged the sheets that once or twice were stiff and crunchy. Ah, the things we do for our fruit and veg.

But in other parts of the garden, there are promises of warmer, brighter days: the spring bulbs are sending up their green shoots. I even have one small tantalising clump of jonquil buds:

Mum already has snowdrops (or snowflakes?) on show, and a neighbour of hers has fully bloomed jonquils! Poor confused bulbs — but what a joyous sight they must be on these bleak, damp days.

I hope you and your plants are safe, no matter what that crazy, contrary woman Mother Nature is throwing at you.
A delicate winter blossom

5 Jun 2016

On tweaking

No recipes this week; how could I when everything I make lately seems to depart, by accident or design, from the original printed word?

I am, as mum herself has said, my mother’s daughter — I’ve inherited the ability to look at a recipe and assess if something doesn’t quite read right, or could do with a little improvement, before I’ve even picked up a knife or turned on the oven. Or — as I’m sure most of us do — juggle and wiggle with quantities or ingredients or cooking times as we go along, to suit what we have on hand or what we’d like to taste or what just feels right.

So I told you last time that I added extra veg to Annabel’s lentilaise; and did some quick thinking during the cooking to get the texture just right. I enjoyed the final tasty dish so much I’ll make it again this winter, probably with further refinements and additions each time.

Above is a tuna pasta bake that, while tasty and filling, was utterly ordinary and not really worth repeating or indeed mentioning here, except for the fact that I used the recipe merely as a very rough guide for flavours and process — but abandoned the quantities entirely. Otherwise I would have been knee-deep in tuna pasta, for weeks to come; the volumes seemed so generous, so vast — for only four servings! (Who are these people with monstrous appetites?). Strangely though, I needed to ramp up the chilli and lemon zest, even in my much reduced pot.

Finally, the mother of all recent tweaks, this oaty cakey thing that was so loosely adapted from a Martha Stewart recipe that even she would not recognise it.

Mum and I agree that Martha recipes are never straightforward. We’ve both made her recipes essentially unaltered, and instead of the 72 biscuits Martha predicts, we end up with … 12. Or the cake is supposed to fill a large tray, yet in our kitchens, barely stretches to a modest slice tin.

But mostly with Martha recipes, it’s the sweetness. I don’t have much of a sweet tooth and tend to under-measure sugar in most of my recipes, but I would defy even the most ardent sugar-sweetie lover to put 2 ½ teaspoons of vanilla into a normal-sized cake. Yes — 2 ½! Are your teeth on edge just thinking about that? That’s on top of the 2 cups of brown sugar! Naturally, I downsized this to the more standard 1 teaspoon.

Maybe even Martha had second thoughts, because the recipe then called for 1 ½ teaspoons of salt. What?! Does that not fizz your brain too? And I wonder (as I do every time, just before I vow never to make another Martha recipe): are these Martha-isms? Does she like extreme flavours? Or is it a cultural thing (I tend to find American recipes on the sweet side)? Or is a me thing?

After these and other adjustments, the resulting cake was surprisingly good (I was prepared for a dud on my hands, despite my confidence in my juggling skills). I was most surprised when my work colleagues whom I fed this too raved about it — one even said it was better than the nutella cake!

But all this tweaking on my feet has left me exhausted. I’m yearning for a cake I don’t have to second guess, a casserole I don’t have to rescue, biscuits that will work. So I’ve returned to some winter faves: my orange ricotta cupcakes, and soon, my syrupy orange upside cake.

Happy tweaking to you all!


29 May 2016

lentilaise


At the supermarket I saw a harried looking woman rudely shoving great handfuls of snow peas into a plastic bag. I was stunned by the force that she handled the peas with — especially considering they were $16 a kilo. At that price, I’d be picking them out more tenderly (at that price, I left them on the shelf).
 
Then I turned to the broccoli, were I saw another woman brutally snap off the stalks and throw them back in the bins before thundering off. I wanted to say something about the stalks being just as delicious, and discarding them was wasteful, but she looked like she might be just as brutal to me.
 
I was shocked at the disrespect, anger and thoughtlessness of those shoppers! Now that I’m buying most of my veg, I make sure I’m choosing the best quality for my money — I don’t want bruised or tattered greens — but I also think of the farmers who grew the produce, and respect their hard work to give me food.

***
 
So moving into winter means buying veg, and it means making heartier dishes like this one. The weather has been strangely, wonderfully mild (punctuated by the odd frigid day), but this week the temperatures plummeted properly, and something more substantial than a roast vegie salad was called for (though that is not to be sneezed at).
 
I finally made some ‘lentilaise’, the legume version of bolognaise. If you’re counting your five a day, this does it, plus some: a base of onions and garlic and carrots and celery and capsicum; chunks of parsnip and wedges of mushrooms; and finally the lentils and some tinned tomatoes and lots of parsley and marjoram (or oregano? I can’t tell the difference).
 
I thought it should have been tomato-ier, but it’s been a long time since I made bolognaise to remember exactly what it should be like; maybe too I was confusing this with a richer pasta sauce. And next time I would use less carrot (carrotaise?); it was a bit too sweet and orange, and I needed to add more of those woody herbs and a tad more tomato paste to balance that.
 
But overall, this bubbling big pot of goodness was winter comfort food. I served it with some fluffy brown rice … and green peas (normal ones) and broccoli (stalks and all).
 
Lentilaise
Adapted from Annabel Crabb’s ‘Special delivery’. I added capsicum and parsnip to the list of vegies. Next time I would blitz the onion, carrot and celery in the food processor first, as my 'finely diced' was still rather chunky; I did an awkward thing of fishing out the parsnip and mushroom chunks then ladling the sauce into my food processor to refine it, then ladling it back into the pot…
  • In a large heavy casserole pot, heat a generous amount of olive oil and add these vege that you have finely chopped or food-processed: one onion, 2 stalks of celery, 1-2 carrots and half a yellow capsicum. Also add some small chunks of parsnip. Put the lid on and cook away till the finer veg is soft (the parsnip will take longer).
  • Once that base veg is soft, add at least 2 tbspns tomato paste, 3 fat cloves of garlic that you’ve chopped or sliced, 150-175 gms mushrooms that you’ve chopped, and a good slosh of wine (I used white). Give it a good stir and pop the lid on to cook for a few more minutes.
  • Now add a tin of chopped tomatoes; then half-fill the tin with water and swish that in too. Add a good pinch of salt and generous amounts of flavoursome herbs like marjoram/oregano and parsley. I used fresh herbs because I still have them growing in the garden, but Annabel specified 1 tspn of dried Italian herbs.
  • Let this simmer away until your parsnip, the hardier of the ingredients, is tender. Then add a drained 400 gm tin of lentils and heat thru, plus more chopped parsley. Serve with love and respect.

15 May 2016

garden ramble: rain and plantings


Looks cold...
Rain. Rain, rain and more rain. Yes finally — it’s raining! And proper big wet stuff, stuff that’s last longer than the usually fleeting moment, where you think ‘oh, it’s raini—’ and it stops before you even finish the thought. No, for the past week, we have had bucket loads, rain gauges full of the stuff. I even found myself thinking quite a blasphemous thought one night, as I brushed my teeth and listened to the pounding on the roof: oooh it could stop a bit now; I don’t want my garlic to rot.

Because the garlic is, like the rain, seemingly unstoppable. I’d barely poked the cloves in the ground and they were poking back up again! There are 33 of the 35 leafy garlic shoots standing proud and upright (except for the one I trod on last weekend). Such a strong crop, so I have high hopes of a good bounty later in the year. As long as they don’t rot with all this strange rain.

I’ve also put in six sprouting broccoli plants. I love broccoli, and a couple of years ago I grew the purple sprouting variety, which was so pretty. This is normal green stuff, but will be just as delicious. Grow little seedlings!

The passionfruit vine is also very vigorous, and is still producing flowers and fruit, which I have pegged so they’re easier to spot amongst the lush greenery. All I need to do now is watch for frost warnings, so I can go out and swaddle my tender baby. I’m not sure at what age I stop wrapping the vines up, but I’m not taking any risks. Hopefully frost is a little while off, though after a very warm autumn, we hit the cold — or it hit us — with a bang; we’ve already had two big dumpings of snow on the mountain. Tassie weather is so changeable, and always a source of speculation and conversation.
Autumn colour for Jem in Brisbane

Moving out of the vegie garden and into the ornamental side of things, dad planted my four new grevillea plants. I hope these will grow into trees and bushes that provide colour for me, and nectar and spiky habitat for birds.
The varieties are copper rocket, which promises hot pink flowers (one of my favourite colours) throughout the year; and flora mason and semperflorens, with softer coloured pink and apricot flowers, again with a long flowering season. It’s easy to have flowers for birds and bees in the spring and summer, but having some food to attract and nourish them in the cooler months can be a challenge. Though this big blue salvia is proving me very wrong:

Finally I leave you with some winter colour, and an example of Mother Nature doing her best to prove that concrete driveways are no match for a determined lion’s plant. Where there’s a will, there’s a way.


8 May 2016

nutella cake


Happy birthday to us!
Let’s celebrate with a big fluffy chocolatey cake smothered with the fudgiest icing ever! Hip hip hooray!

Nutella cake
Adapted from a Women’s Weekly recipe. The recipe specified a deep 22cm round tin; I don’t have one of those, so I used a deep 20 cm and made four little muffins. My friend M, who first made this cake, topped hers with tart red raspberries; I went for spangly silver cachous. Best shared with people singing and oohing and ahhing.

  • Prep your tin (see above) and preheat oven to 180.
  • In a small jug, combine ½ cup cocoa, ½ cup boiling water and a pinch of salt, and stir until it’s a beautiful chocolate slurry.
  • In a large bowl (and if you have a freestanding mixer, use that), beat 185 gms soft butter with ¾ cup white sugar, ¾ cup brown sugar and 1 tspn vanilla.
  • Beat in 3 eggs, then the chocolate slurry (enjoy the swirly patterns!), ½ cup nutella, and 180 mls buttermilk (enjoy the mousse-like texture!). At this point, it is entirely reasonable to have a sneaky taste test. Or two.
  • Now use a wooden spoon to fold thru 1 ½ cups SR flour and ½ cup plain flour. Remember to lick the beaters once you’re finished with your mixer. After all, it’s your birthday.
  • Pour this beautiful batter into your tin and bake for 1 ¼ hours until done. You may need to cover the cake partway through to prevent the top from burning.
  • Once baked, cool on a wire rack in the tin.
  • Meanwhile, gently melt 200gms of dark cooking chocolate, then stir in 1 cup nutella (I actually had slightly less than these quantities, but it turned out very well). Allow to cool a little, then turn out your cake, and pour over the icing. Decorate as you wish — and enjoy!

24 Apr 2016

garden ramble: autumn update


 Leaves on my birch trees

Autumn is here, and with it cooler mornings that tease of the dreaded dark months of winter just around the corner; it brings boldly coloured leaves shining through the suburban landscape — all reds and golds and burnished oranges. This autumn has seen (felt?) more blustery winds than usual — decimating those lovely leafy displays — and not much rain at all.

I am starting to despair for my ornamental garden, despite my parents’ reassurances; even with weekly watering (all I have time for), I’ve got some trees and shrubs looking decidedly sickly. Summer’s dry heat may have been too much for them, and sadly, I fear autumn’s continuing dry may finish them off completely.

Leaves off my birch trees

On a productive note, autumn means cleaning up and closing down the vegie garden. It’s a quick job this year, as again, due to summer’s harsh weather, I’ve already gotten rid of most of the crop. Over Easter I pulled up all of the tomatoes and most of the beans, all desiccated and messy in their crisp decay.

New silverbeet

There is very little left. Apart from the fruit trees (which are still very green and leafy), the exuberant passionfruit, and of course the rhubarb and herbs, I have five new silverbeet plants, transplanted from dad’s vegie garden and doing very well. I also have an astounding, sturdy forest of self-sown capsicums. These plants came up from kitchen scraps I’d dug into the vacant beds over last winter! There are massive dark green fruits on them, and I’m impatiently waiting for them to ripen before the winter chill sets in. I’ve even managed to make my dad envious!

Still life with capsicums

My lovely friend A and his strong male muscles came over one weekend to dig over one of the vegie beds, which was particularly compacted. The others I could manage myself, but I’m hopeless at sustained digging in such hard soil; even with a heavier new garden fork (I figured I deserved it) I just don't have much weight or strength to throw behind it. A’s generous help was so very welcome. He broke it up and we then fed it up with some lovely pongy sheep poo dad had delivered for me a few weeks ago (the neighbours must love me), and threw around some gypsum for good measure.
Out with the beans

I’ll now be able to dig in kitchen scraps again to reinvigorate it over the winter months (and maybe get another crop of self-sown capsicums).

Finally, I've planted my garlic. Or rather, T’s garlic — I hadn’t saved any of my own garlic this summer, but froze it all for eating! The gorgeous T generously came to my rescue with a bag of her beautiful fat homegrown alliums. What a joy.

Last of the carrots

Besides the watering that is still needed (let's all pray for rain), now I can settle down with a cup of tea and lots of gardening books to start thinking about next season. After a tip off from Caro, I found Sarah Raven’s ‘The best vegetable plot’. I should read Australian books, but I just adore British books and magazine, and blogs!
And last of the beetroot

Reading books like this make the misery of dry soils and dying plants dissolve for a moment; they allow me to escape into fantasies of lush and abundant and always-green gardens where there’s never an aphid or sparrow or hard patches of soil, just tender leaves, juicy produce, vibrant flowers — and relaxed gardeners. Ah, let me put the kettle on and we can all dream on …
A pristine dahlia


17 Apr 2016

passionfruit polenta pudding


Oh Annabel, I’m sorry…

It’s not you, it’s me; truly — absolutely it was my wrongdoing. You see, I decided to go my own way, tin-wise. Why use a regular round springform tin, when a handsomely fluted bundt is much more impressive?

Well, this mess is why, and it’s not impressive at all. Even with adequate greasing and tin prep, this moist and zesty polenta cake refused to budge, and stayed resolutely in the folds of the bundt tin. Obstinate! I upended it on a plate, and gave the tin many good whacks and thumps and curses. Finally, half came out in big golden chunks, but the rest required forceful prising out with a spoon. I gobbed it into a pudding dish and poured over the deliciously sweet-tangy passionfruit syrup, and called it a day.

Such a shame; it is a beautifully moist pudding — too substantial from the coconut and gritty polenta to be a cake, really. I would make it again, and I would urge you to consider it as well — and to use the proper tin.

Passionfruit polenta pudding
Adapted from Annabel Crabb’s ‘Special delivery’. I’ve given Annabel’s tin details and instructions here — not what I did, nor my disaster recovery efforts! This is best warm: I kept it in the fridge and it set rock hard, so enjoy it once you’ve baked it, or zap it in the microwave to warm up. Actually, it doesn't look too bad now, does it?

  • Preheat oven to 180 and line a 20 cm springform tin.
  • Combine dry ingredients in a bowl: 150 gms almond meal, 100 gms polenta, 50 gms desiccated coconut, and 1 ½ tspns baking powder. That’s right – no flour.
  • Cream 200 gms soft butter with 200 gms sugar and the zest of 2 lemons. Then beat in 3 eggs.
  • Now fold thru, in batches, the dry ingredients. Have a taste at this point — I added a good squeeze of half a lemon to make it even zestier. If you’re going to have lemon, have lemon!
  • Gob into the tin (note: mine was an incredibly stiff batter, so I was mildly anxious as Annabel said to ‘pour’ it in the tin. Mine was not pourable!).
  • Bake for 30 minutes or until just done (another note: even in my bundt tin, it took considerably longer than this, so see what happens for you after 30 minutes).
  • Meanwhile make the syrup: heat the juice of 2 lemons and the pulp from at least 2 passionfruits (depending on size). When this is warm, whisk in 100 gms of icing sugar and simmer gently to thicken.
  • Once your cake is done, and while still warm, prick the cake with a skewer and slowly pour the syrup over. I would say then you can remove the tin, and enjoy your passionfruit polenta pudding. As a whole.

10 Apr 2016

blondie slice


I’m not a big one for anything milk chocolate — but I am a big one for anything fudgy, rich, and morish, and this blondie slice fits that bill precisely.

Just what makes a blondie a blondie is a bit confusing; white chocolate? No chocolate? Depends on who you talk to, what you’ve googled. But really (adopt best blasé voice for this next bit): whatever. No matter what your definition of a blondie is, these little squares are seriously good, with their dense texture and butterscotch flavour.
And about those ‘little squares’? The original recipe suggested cutting your 8 inch blondie into 36 pieces – that’s six by six. Really? How … stingy! I cut the square four by four, and that was petite enough for me.
Finally, this is a very flat blondie — it doesn’t rise much, if at all — so I’ve called it a slice so you don’t get the impression you’ll have a big deep hunk of cake.

But please don’t let any of this deter you from trying these; the caramelly flavour and fudgy texture, punctuated by just the right amount of walnuts, make these blondie slices — whatever you call them and however you cut them — just delicious.

Blondie slice
Adapted from ‘Hand made baking’ by Kamran Siddiqi. I’ve significantly reduced the vanilla; I also omitted white chocolate as I don’t like that either! Such a fusspot when it comes to chocolate…

  • In a medium bowl sitting over a saucepan of simmering water, melt 85 gms butter. Once that’s done, turn the heat off but leave the bowl in place (to use the residual heat), and stir in 1 cup light brown sugar, a scant ¼ tspn salt and ½ tspn vanilla. It may look separated, but don’t worry.
  • Remove bowl from saucepan and stir in 1 large egg, ½ cup wholemeal plain flour and ½ cup white plain flour.
  • Now leave the mixture to cool slightly — use the time to chop enough milk cooking chocolate into ½ cup of chunks of varying size, and get 1/3 cup walnut pieces. Prep your 8 inch brownie tin. Preheat your oven to 180. Do the dishes and clean up the kitchen. Make a pot of tea! I found if the cake batter is cooled slightly, the milk chocolate won’t melt away to nothing — you’ll retain more of the chunks. Having said that, you get a fudgier final result if some does melt on contact with the warm batter. 
  • So after all that, add your milk chocolate and walnut chunks, dollop batter into tin (it’s very stiff – I use a knife to spread it about) and bake for 20-25 minutes — it’s a quickie! You’ll get that nice shiny crinkly ‘brownie’ top. Enjoy!